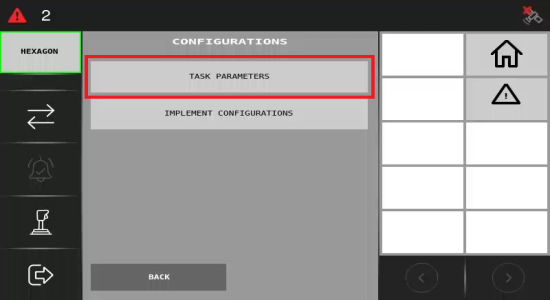
Task Parameters
On this screen, you can adjust the application width settings for the implement and perform its calibration.
Press Task parameters to configure the Application width and Calibration.
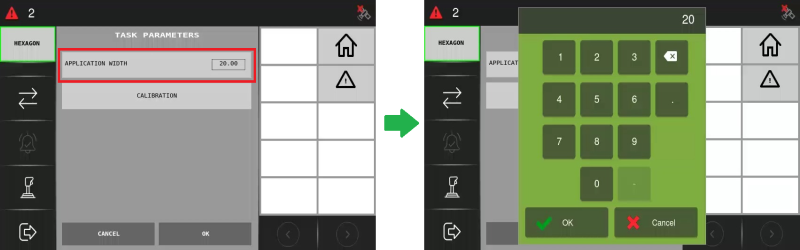
Application Width
Application width refers to how wide the implement will apply that specific product, which varies depending on the type of material being applied and disk settings.
Click on Application Width to open a box where you can manually enter your desired width. Press OK to confirm your changes.
Calibration
The calibration of an implement involves adjusting the equipment to ensure precise and efficient application of inputs.
It is recommended that the ECU be calibrated for every input type. To do so, press Calibration.
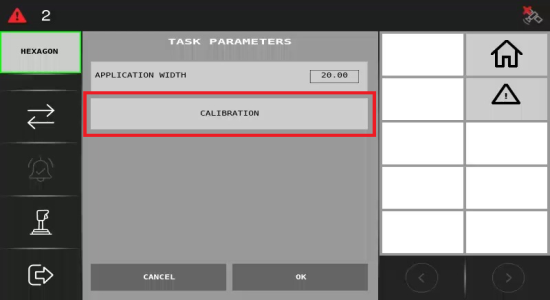
You will be directed to a page where you can view all inputs and have the option to add, edit, or delete them.
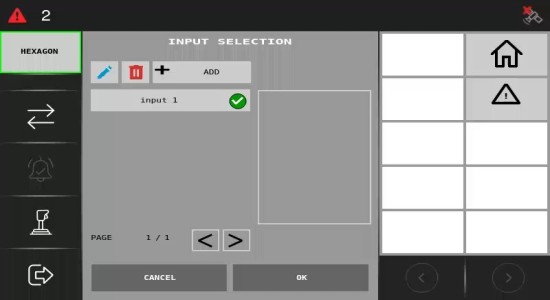
Adding an Input
To add an input, press + Add and you will be redirected to the page below.
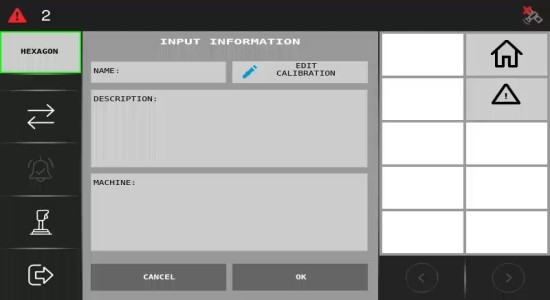
Enter the input name, its description, and the associated machine.
Once you are done, to save your changes, click Ok.
 . You will then be able to modify the input name, description, and associated machine.
Deleting an Input
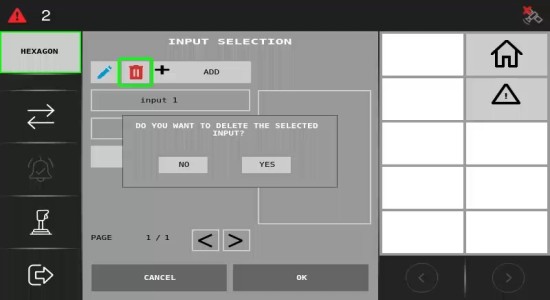
To delete an input, select it and click the trash can icon. A pop-up message will prompt you to confirm the deletion. Click Yes to proceed.
Now that you have added the inputs, you can proceed with the calibration.
Input Calibration
To adjust the equipment to ensure precise and efficient application of inputs, you will need to calibrate the implement with an input.
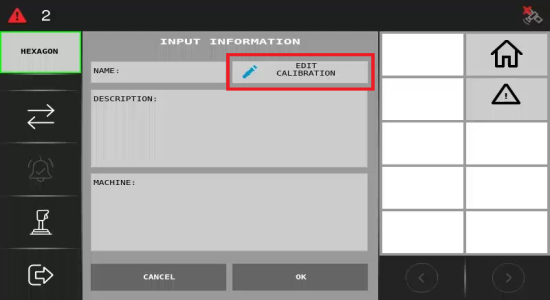
To do this, click on the input you want to calibrate and choose Edit calibration.
To perform calibration, you will need to fill out the fields below:
-
Reference (rpm): Refers to the specific rotation speed in revolutions per minute that you want the equipment to operate during calibration.
-
Time: The length of time required to complete the calibration process.
For instance, in the image below, the reference speed is set to 300 rpm, and the duration is 30 seconds.
After filling out the Reference and Time fields, click Start to begin the calibration.
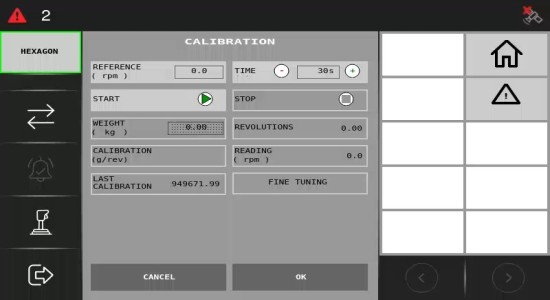
Once the length of time required to complete the calibration process has been reached, the calibration will stop automatically.
Then, you should fill out some fields with data collected from the calibration:
-
Weight (kg): During calibration, the accurate weight value for precise measurements is determined. After completing the calibration, enter the weight (in kilograms) value obtained into this field.
-
Revolutions: The system will automatically calculate and fill out the number of revolutions based on the calibration results.
-
Calibration (g/rev): Result of the current calibration, calculated based on the weight collected and the number of revolutions (grams per revolution).
-
Current Reference: Shows the variation in rpm (revolutions per minute).
-
Last Calibration: Displays the result of the previous calibration if it was performed. If not, it shows 0.
-
Fine Tuning: This involves making further adjustments based on the data collected during calibration.
Next, you will learn how to adjust the Implement configuration.